How to Setup and Configure Swagger API Documention in Nestjs.

Software Engineer | Technical Writer | Content Creator
Introduction
Nestjs is a back-end framework for building efficient, scaleable Node.js server-side applications. It was built with TypeScript and yet enables programmers to code in Javascript. In addition, it utilizes object-oriented programming, functional programming, and functional reactive programming concepts. Under the hood, it uses HTTP server-side frameworks like Express and Fastify.
Set up Nest js Application
For first-timers, I'd recommend using Nest CLI to bootstrap your project
npm i -g @nestjs/cli
nest new project-name
After running the above code snippets, the “project-name” directory will be created in the local machine, inside the directory, “src” will be found there with other files such as main.ts, app.controller.ts, etc.
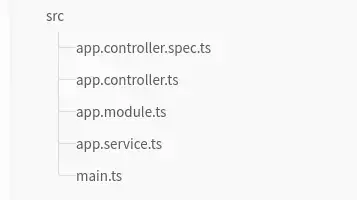
PS: I wouldn’t go deep into what goes on inside the controller and service.ts files as it's beyond the scope of this article.
The main.ts file in your src directory should be like the snippet below. Inside the main.ts file, we will set up the Swagger configurations.
import { NestFactory } from '@nestjs/core';
import { AppModule } from './app.module';

async function bootstrap() {
  const app = await NestFactory.create(AppModule);
  await app.listen(8000);
}
bootstrap();
Swagger Configuration
installation
Firstly, we install the required nestjs/swagger dependency.
npm install --save @nestjs/swagger
initialize the swagger module class
once the installation process is complete. Open the main.ts file, import Swagger modules and the document builder from nestjs/Swagger, and initialize it like this:
import { NestFactory } from '@nestjs/core';
import { AppModule } from './app.module';
import { DocumentBuilder, SwaggerModule } from '@nestjs/swagger';

async function bootstrap() {
  const app = await NestFactory.create(AppModule);
  const config = new DocumentBuilder()
    .addBearerAuth()
    .setTitle('CRUD API')
    .setDescription('The CRUD API documentation')
    .setVersion('1.0')
    .addTag('CRUD')
    .build();
  const document = SwaggerModule.createDocument(app, config);
  SwaggerModule.setup('api', app, document);
  app.enableVersioning({
    type: VersioningType.URI,
  });
  app.setGlobalPrefix('v1/api');
  await app.listen(8000);
}
bootstrap();
In the above code snippet,
DocumentBuilder does two things, it structures our documentation and ensures it conforms with open API specifications.
createDocument() method takes in 2 arguments: the application instance and config.
setup() method takes in 3 arguments: path to swagger (“api”), application instance, and document
enable versioning of your API by calling the enableVersioning method which takes an object as an argument with key/value pair “ type: VersioningType.URI”.
set a global prefix to your API path incase you want to set up versioning as stated in 4 above, we can add “v1/api” for instance, or any convention you want to use for your API
run the command “npm run start:dev”
go to http://localhost:8000/api, there you can see your swagger documentation
Conclusion
In this article, we have learned how to boostrap a nest js application using nest js cli, install and initialise nestjs-swagger module and lastly configure and set up swagger API documentation with nestjs.

